Author:殷帅鹏
Creation Date:2021-12-08
Update Notes:
- 暂无
参考地址 https://www.elastic.co/cn/
2022-02-17: 培训结束
# 使用篇
# 使用之Logstash篇
Logstash 在ELKF中主要是用于接收到Filebeat抓取的日志文档,进行格式处理,格式化输出到Elasticsearch当中。
工作流程

Logstash 工作的三个阶段
- input:数据输入端,接收来自filebeat的数据
- filter:数据中转层,主要对日志进行匹配过滤,格式处理,数据类型转换,字段添加修改等。
- output:数据输出端,将负责将数据输出到elasticsearch cluster中
Example:
  input {
    beats {  ## input beat插件
      port => 5045  ## 暴露给filebeat的端口,filebeat推送数据时 保持一致
      client_inactivity_timeout => 36000  ## 客户端响应超时时间
    }
  }
  filter {
   if ([filetype] == "golog"){  ## 通过filebaet携带字段,对日志文档进行分类处理
      grok{  ## grok 正则匹配
        match => {
          "message" => "%{TIMESTAMP_ISO8601:time}\t%{LOGLEVEL:level}\t(?<content>[a-zA-Z\s]+)\t%{GREEDYDATA:msg}"
        }
      }
    } else{
      drop{}
    }

    if ("_grokparsefailure" in [tags]){  ## grok正则未匹配到会被打上_grokparsefailure标签
      drop{}  ## 删除此条日志数据
    }
    ## 可根据业务对字段更细化的处理
  }

  output {
    elasticsearch {  ## output elasticsearch插件
      hosts => ["http://ip:9200","http://ip:9200","http://ip:9200"]  ## 集群地址
      index => "lowaniot-%{+YYYY.MM.dd}"  ## 自定义索引名称
      template_name => "lowaniot_tem"  ## 指定索引模板
      template => "/data/tools/elasticsearch/logstash/lowaniot_tem2.json"  ## 指定索引模板地址
      template_overwrite => true  ## 启用覆盖模板
      user => "elastic"
      password => "password"
    }
  }
# 使用之Elasticsearch篇
Elasticsearch是一个基于Lucene (opens new window)的搜索服务器。它提供了一个分布式多用户能力的全文搜索引擎 (opens new window),基于RESTful web接口。
本文将基于Elasticsearch的Restful web接口语法及Java Springboot项目集成的RestHightLevelClient-API的使用进行介绍
Elasticsearch倒排索引
# 索引(index)基本操作
PUT /lowaniot-index -- 创建索引
{
  "mappings": {
    "properties": {
      "name":{
        "type": "text"
      },
      "age":{
        "type": "text"
      }
    }
  },
  "settings": {
    "number_of_replicas": 1,
    "number_of_shards": 1
  }
}
创建索引的同时可以设置相应的字段映射以及基本设置
TIP
映射一经创建不能修改
分片一经创建不能修改
副本可通过命令形式动态修改
DELETE /lowaniot-index 删除索引
DELETE /* 删除所有索引
GET /_cat/indices?v 查看索引信息
# Springboot集成Elasticsearch
首先通过maven导入依赖(注意版本问题)
        <!-- elasticsearch dependency-->
        <dependency>
            <groupId>org.springframework.boot</groupId>
            <artifactId>spring-boot-starter-data-elasticsearch</artifactId>
            <version>2.5.6</version>
        </dependency>
注入Elasticsearch相关配置
    /**
     * 配置elasticsearch config
     * 认证需要加入用户名和密码
     * @return
     */
    @Bean
    public RestHighLevelClient builder() {
        HttpHost httpHost1 = new HttpHost("192.168.20.209", 9201, HttpHost.DEFAULT_SCHEME_NAME);
        HttpHost httpHost2 = new HttpHost("192.168.20.209", 9202, HttpHost.DEFAULT_SCHEME_NAME);
        HttpHost httpHost3 = new HttpHost("192.168.20.209", 9203, HttpHost.DEFAULT_SCHEME_NAME);
        RestClientBuilder builder = RestClient.builder(httpHost1, httpHost2, httpHost3);

        // 认证所需要配置
        CredentialsProvider credentialsProvider = new BasicCredentialsProvider();
        credentialsProvider.setCredentials(AuthScope.ANY, new UsernamePasswordCredentials("elastic", "9cQoekEHdoNNrrcNEznK"));
        builder.setHttpClientConfigCallback(f -> f.setDefaultCredentialsProvider(credentialsProvider));

        return new RestHighLevelClient(builder);
    }
开始使用API
创建索引
    @Resource
    private RestHighLevelClient client;

    @Test
    public void createIndex() throws IOException {
        // 创建索引
        CreateIndexRequest request = new CreateIndexRequest("index-spring-test");
        CreateIndexResponse response = client.indices().create(request, RequestOptions.DEFAULT);
        String index = response.index();

        log.info("index :{}",index); // index :index-spring-test
    }
删除索引
    @Test
    public void deleteIndex() throws IOException {
        // 删除索引
        DeleteIndexRequest request = new DeleteIndexRequest("index-spring-test");
        AcknowledgedResponse response = client.indices().delete(request, RequestOptions.DEFAULT);

        boolean ack = response.isAcknowledged();

        log.info("ack :{}",ack); // ack :true
    }
查询索引
    @Test
    public void queryIndex() throws IOException {
        // 查询索引
        GetIndexRequest request = new GetIndexRequest("index-spring-test");

        GetIndexResponse response = client.indices().get(request,RequestOptions.DEFAULT);
        Map mapping = response.getMappings();
        Map setting = response.getSettings();

        log.info("mapping :{}",mapping); // mapping :{...}
        log.info("setting :{}",setting); // setting :{...}
    }
上面简单介绍一下关于索引的操作,下面开始学习对文档的操作。
写入文档
@Test
public void addDoc() throws IOException {
    // 添加文档
    IndexRequest request = new IndexRequest("index-spring-test");
    request.id("1");
    Map<String, Object> source = new HashMap<>();
    source.put("name","张三");
    source.put("age",19);
    source.put("grade",80.6);
    source.put("time", LocalDateTime.now());
    request.source(source);

    IndexResponse response = client.index(request, RequestOptions.DEFAULT);
    int status = response.status().getStatus();

    log.info("status :{}",status); // status :201
}
批量添加文档
    @Test
    public void bulkDoc() throws IOException {
        // 批量添加文档
        IndexRequest request = new IndexRequest("index-spring-test");
        request.id("4");
        Map<String, Object> source = new HashMap<>();
        source.put("name","张三");
        source.put("age",19);
        source.put("grade",80.6);
        source.put("time", LocalDateTime.now());
        request.source(source);
        IndexRequest request2 = new IndexRequest("index-spring-test");
        request.id("5");
        Map<String, Object> source2 = new HashMap<>();
        source2.put("name","张三");
        source2.put("age",20);
        source2.put("grade",80.6);
        source2.put("time", LocalDateTime.now());
        request2.source(source2);
        BulkRequest bulkRequest = new BulkRequest("index-spring-test");
        bulkRequest.add(request);
        bulkRequest.add(request2);
        BulkResponse responses = client.bulk(bulkRequest, RequestOptions.DEFAULT);
        String message = responses.buildFailureMessage();

        log.info("message :{}",message); // message :failure in bulk execution:
    }
删除文档
    @Test
    public void deleteDoc() throws IOException {
        // 删除文档
        DeleteRequest request = new DeleteRequest("index-spring-test");

        request.id("A1pKL38BOFGJgKttRR1K");
        DeleteResponse responses = client.delete(request,RequestOptions.DEFAULT);

        int status = responses.status().getStatus();

        log.info("status :{}",status); // status :200
    }
更新文档
    @Test
    public void updateDoc() throws IOException {

        // 更新文档 (支持局部更新)
        UpdateRequest request = new UpdateRequest("index-spring-test", "5");
        Map<String, Object> source = new HashMap<>();
        source.put("name", "刘秀大帝");
        // source.put("age", 39);
        source.put("grade", 99.6);
        // source.put("time", LocalDateTime.now());
        request.doc(source);

        UpdateResponse response = client.update(request, RequestOptions.DEFAULT);

        int status = response.status().getStatus();
        log.info("status :{}", status); // status :200
    }
通过ID查询文档
    @Test
    public void getDoc() throws IOException {

        // 通过ID获取文档
        GetRequest request = new GetRequest("index-spring-test", "5");
        request.id("5");

        GetResponse response = client.get(request, RequestOptions.DEFAULT);

        String source = response.getSourceAsString();
        log.info("source :{}", source); // source :{"grade":99.6,"name":"刘秀大帝","time":"2022-02-25T13:28:11.107788Z","age":39}
    }
前缀查询
    @Test
    public void prefixDoc() throws IOException {

        // 前缀查询
        SearchRequest request = new SearchRequest("index-spring-test");
        SearchSourceBuilder source = new SearchSourceBuilder();
        source.query(QueryBuilders.prefixQuery("name","张"));
        request.source(source);
        SearchResponse response = client.search(request,RequestOptions.DEFAULT);
        SearchHit[] hits = response.getHits().getHits();
        for (SearchHit hit : hits) {
            String sourceAsString = hit.getSourceAsString();
            log.info("source : {}", sourceAsString);
        }
        log.info("total : {}",response.getHits().getTotalHits().value); // total : 3

    }
# 使用之Kibana篇
Kibana (opens new window) 是用于在 Elasticsearch 中可视化数据的强大工具。 这是开始探索您的 Elasticsearch 数据的方法。Kibana 是一种开源分析和可视化工具,可通过基于浏览器的界面轻松搜索,可视化和探索大量数据。 除了 Elasticsearch,Logstash 和 Beats 之外,Kibana 是Elastic Stack(以前称为 ELK Stack)的核心部分。
# Kibana链路日志查询使用
下面将演示一篇通过罗万智联平台接入设备,在执行计划时出现计划执行失败现象,通过使用Kibana来快速查询到相关的链路日志同时找到失败原因并定位到问题模块。
首先我们需要通过罗万智联平台找到相应的计划管理
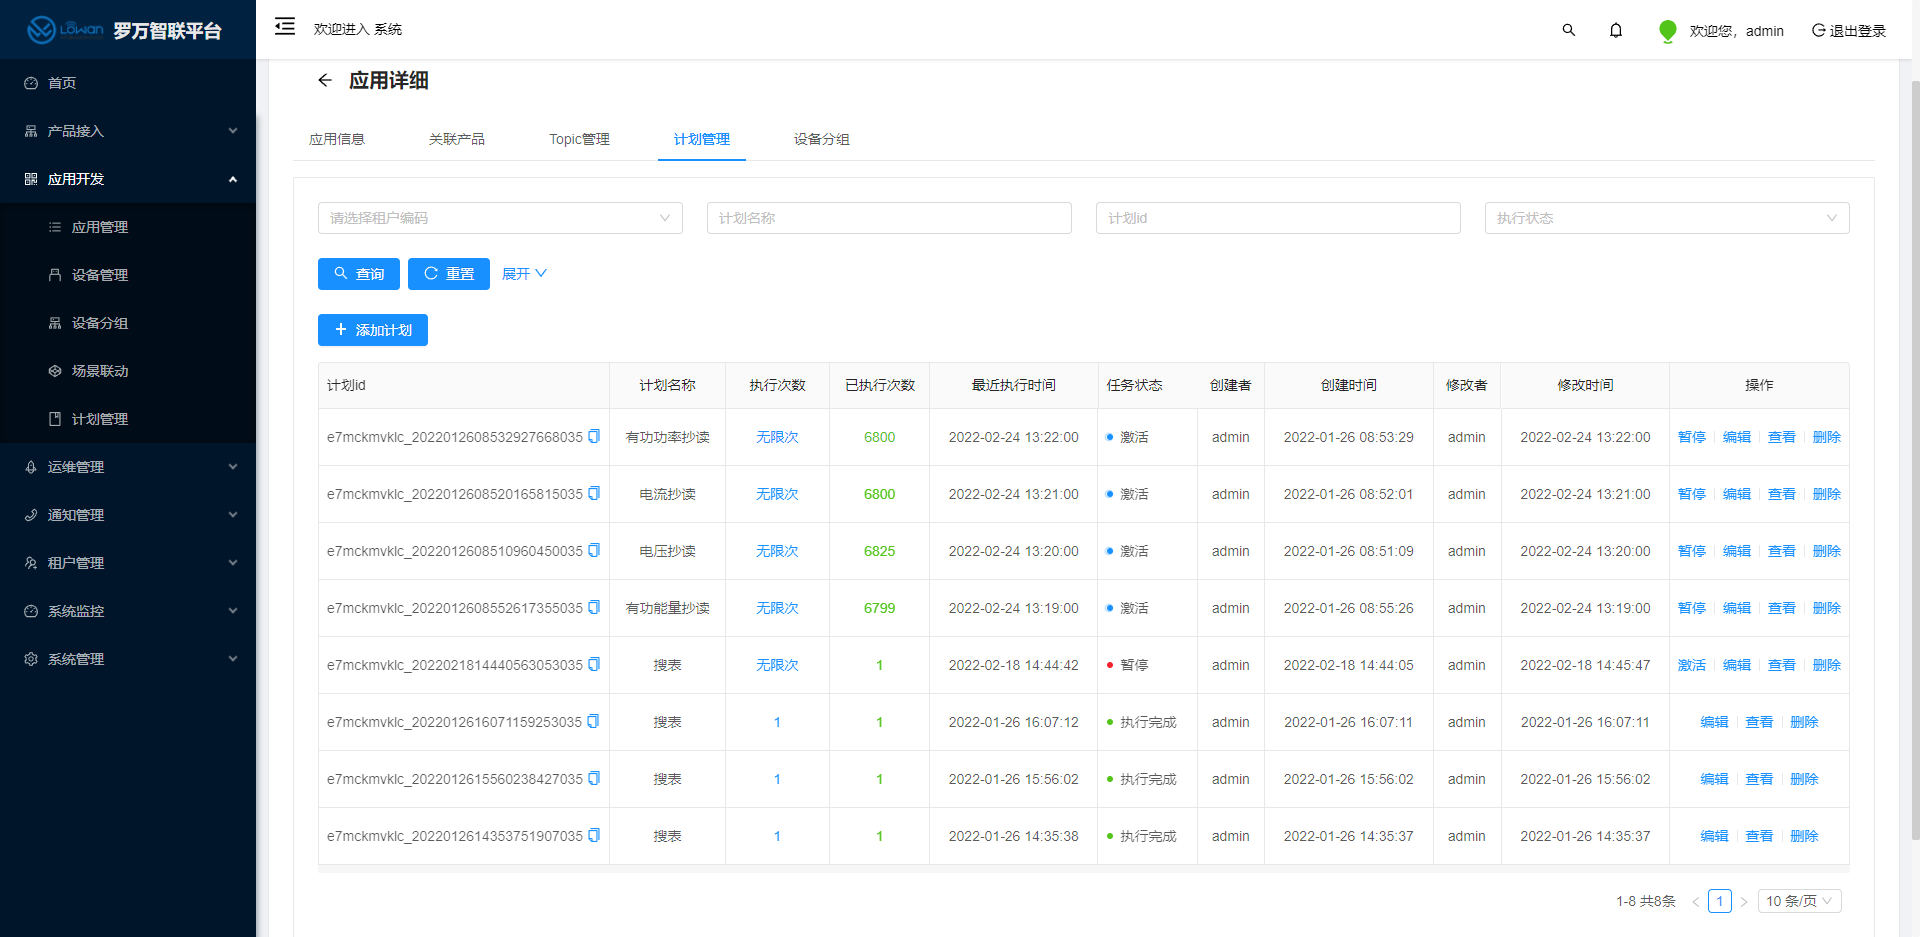
查看计划管理详情通过计划批次详情查看计划成功率
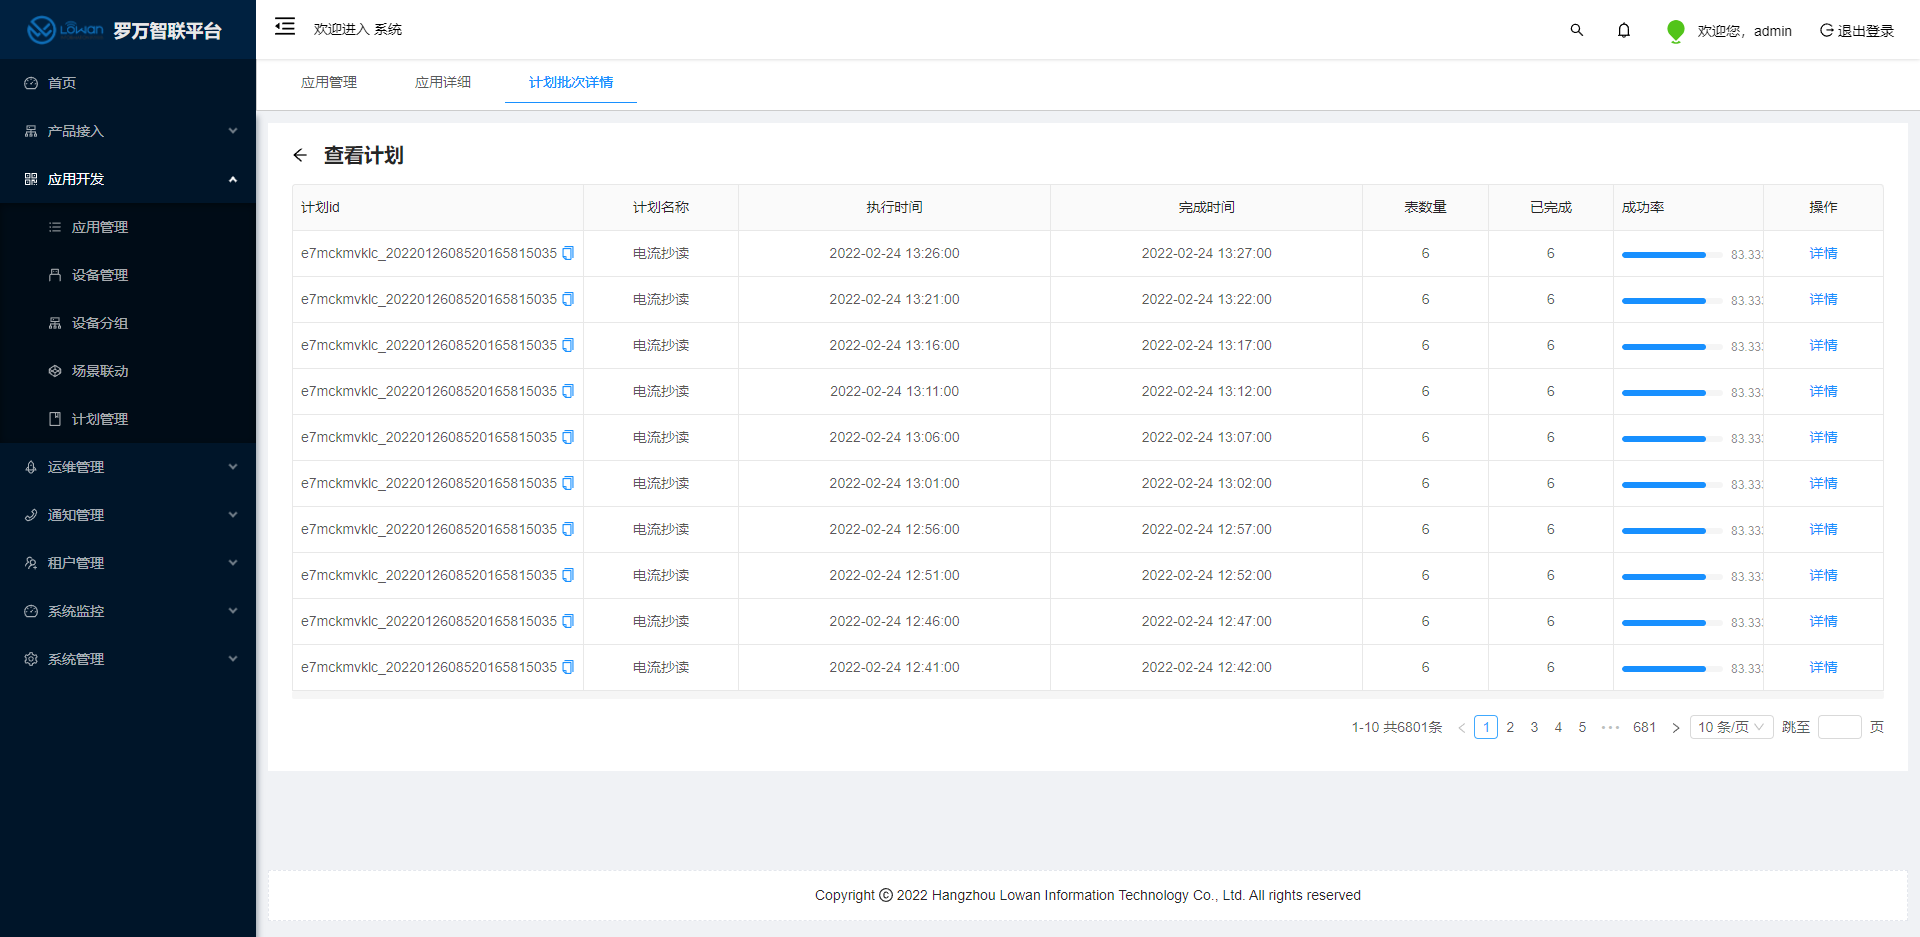
可以看到,我们六个设备在执行电流抄读的时候,成功率只有83.33%,此时我们就需要查询具体设备执行计划的链路日志来定位到计划执行失败的原因。
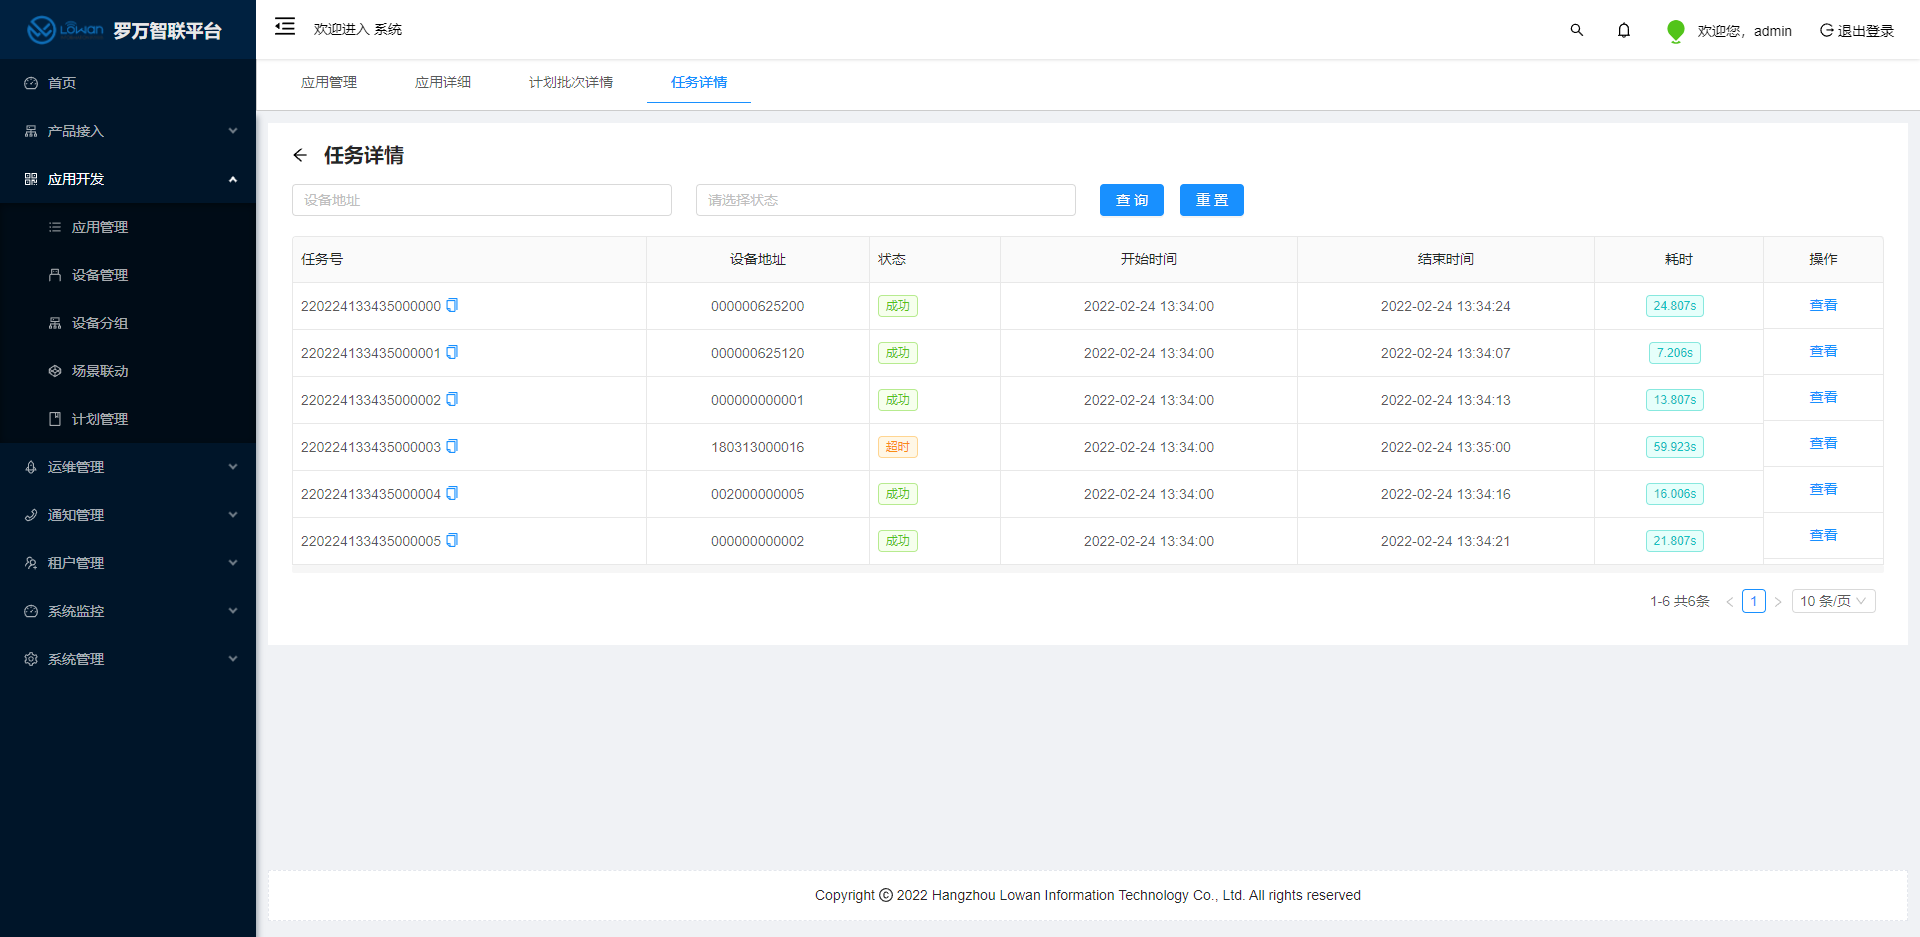
点击进入详情,我们可以通过罗万智联平台清楚的知道,各个设备的执行情况,很明显,设备(180313000016)状态为超时,计划执行失败了。
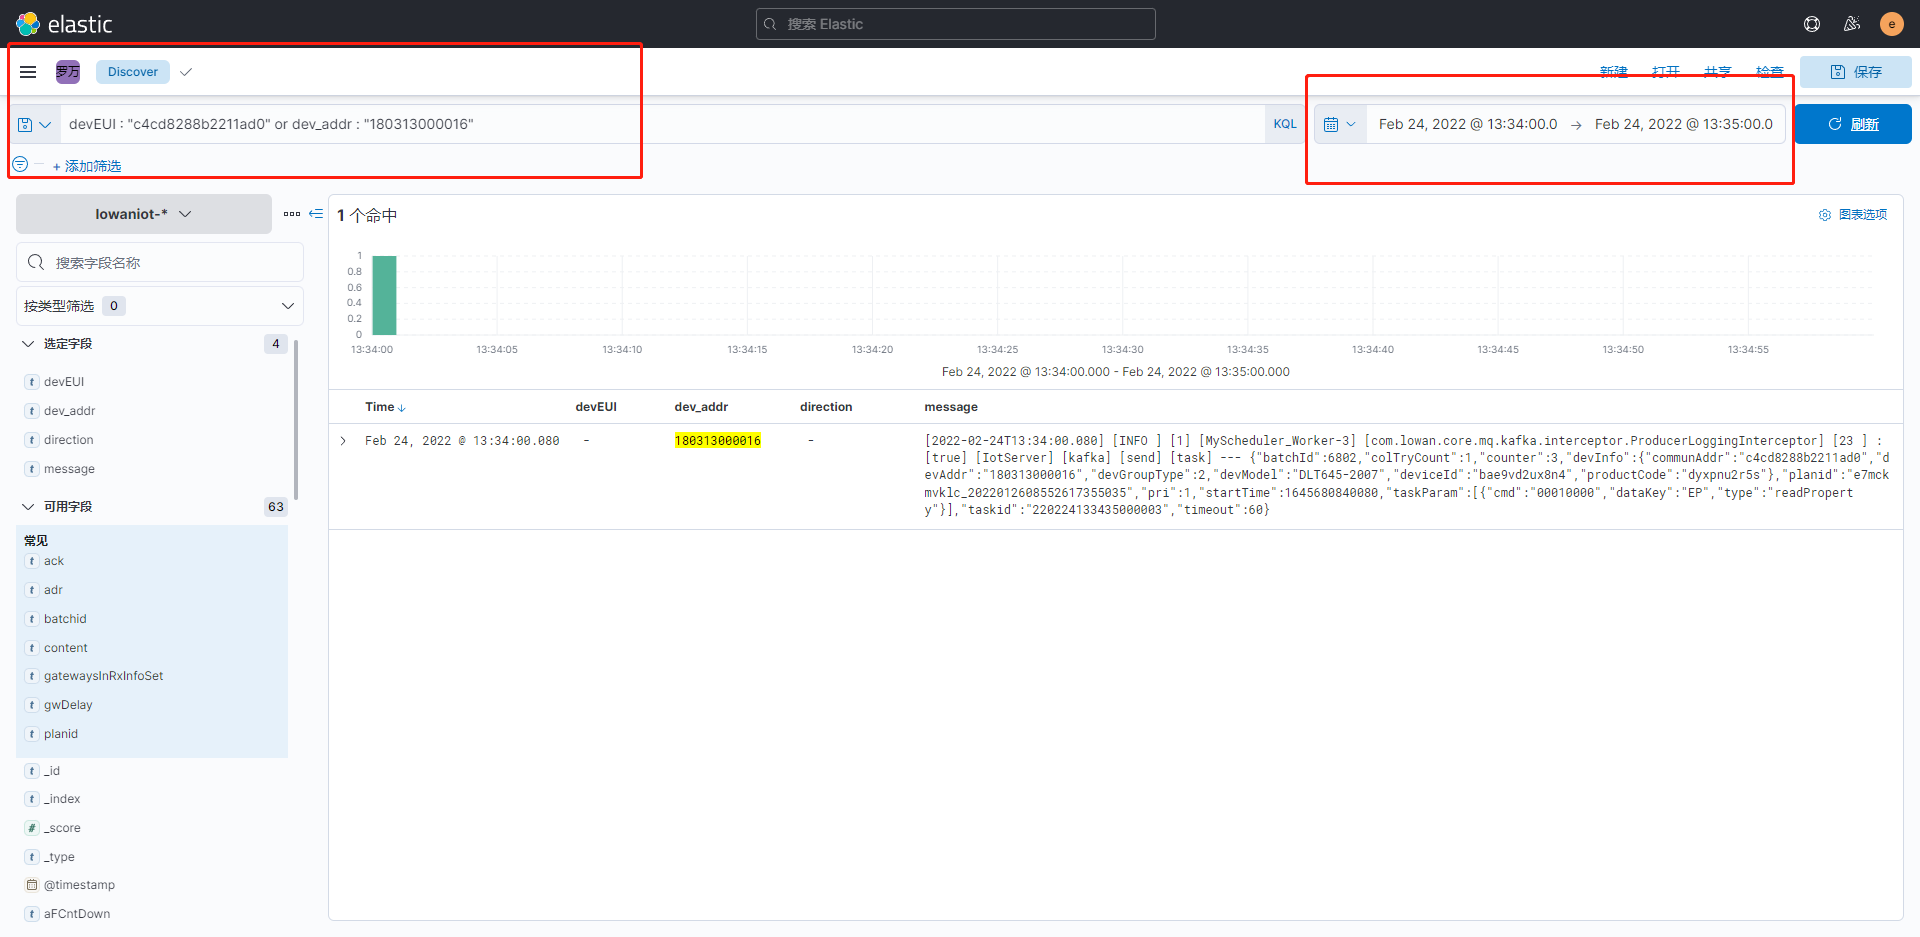
此时我们就可以打开Kibana,通过查询链路日志来快速定位问题。在浏览器中输入我们的Kibana地址,进入到Kibana的操作界面。
通过刚刚计划执行失败情况,我们可以知道计划执行时间(date),以及设备地址(dev_addr),同时我们还需要知道设备所绑定的采集器地址(devEUI)。
首先我们来查看一下设备(180313000016)计划成功时打印的日志
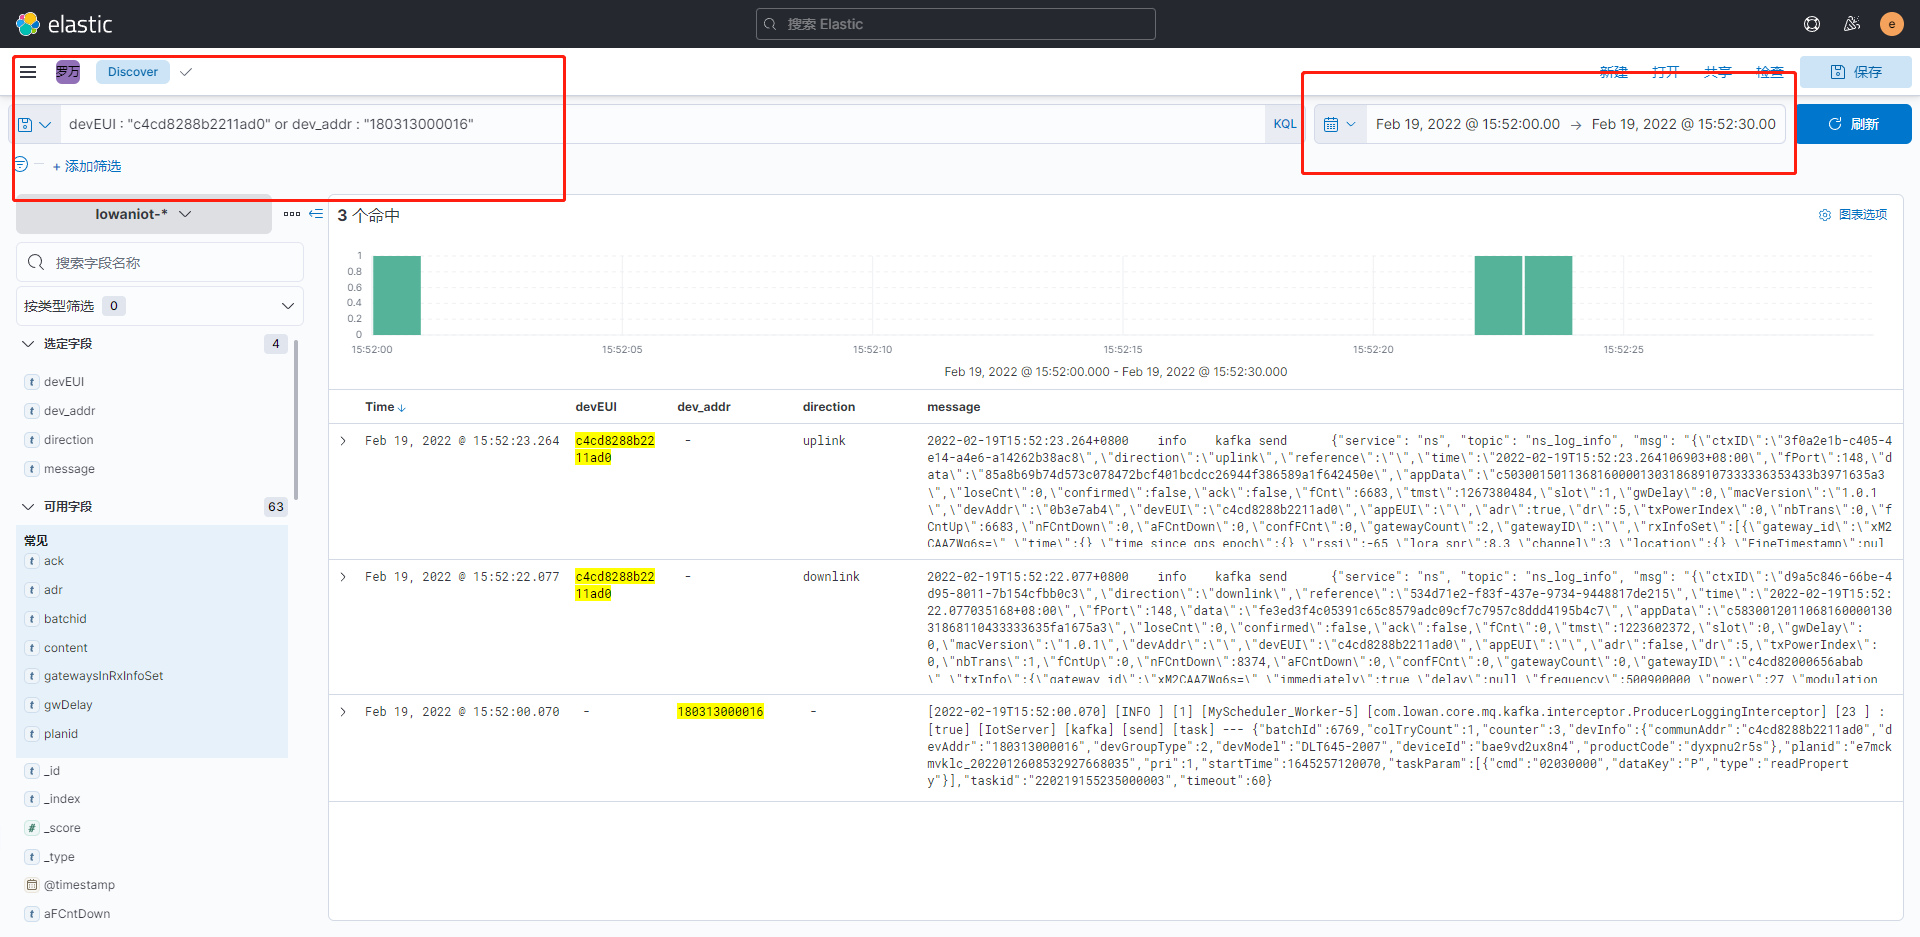
在这里可以看到,罗万智联平台通过kafka下发任务,lora接收到任务下发到设备,设备执行计划后,返回上行数据,这是一套完整的计划执行链路。
看过完整计划执行链路日志以后,我们可以回到上面的问题,找出设备(180313000016)状态为超时的原因。
可以通过日志看出,罗万智联平台下发任务以后,lora并没有继续向设备发送下行指令,最终罗万智联没有收到lora的上行返回指令,导致计划执行超时。
← ELKF部署篇 kubernetes部署 →